Overview
If you are a Cloud Service Provider and would like to offer Apps like WordPress, Joomla, etc on your Cloud Platform, this guide will help you do so. Webuzo has hundreds of Apps and its also a one in all LAMPP stack which supports Apache, MySQL, PHP, Perl, Python, SQLite, FTP Server, DNS Server, etc. If one needs a LAMP stack or any application like Magento, phpBB, etc that need to be deployed in minutes, Webuzo is the best solution in the market.
Create an OS Template
You first need to create an OS template so as to deploy Webuzo. You can follow the Creating a OS Template guide.
Launch Instances
Using the OS Template you just created, you can now launch Instances with Webuzo already installed. Launching an Instance will differ as per your platform and thus not included in the scope of this guide. You can also use the very same template to launch an Application Specific Instance i.e. Webuzo Instance with WordPress or Joomla or any such Applications.
Methods of Configuration
Webuzo can be configured using two different ways. You can either use URL APIs to configure Webuzo using either cURL or from browsers. You can also configure Webuzo using the Unattended Method by running a small PHP script.
Configure instance using URL Parameters
In this section, we will see how to configure Webuzo by passing URL parameters. LAMP stack and WordPress will be used as an example to explain this method in detail.
Collect Information
First, you will need to find out certain informations :
1) Softname : This denotes the unique stringname of application that you want to install. You can get the list of application provided by Webuzo and their corresponding Softname from the apps.php file. It contains a multidimensional array of the format array ( ... 'softname' => 'lamp' ... )
2) Script ID : This denotes the ID of the script that you want to install. You can get the list of scripts provided by Softaculous and their corresponding IDs from the scripts.php file. It contains a multidimensional array of the format 'SID' => array()
e.g. For WordPress the Script ID i.e. sid is 26.
3) Webuzo License Key : Your Webuzo License key will be required. So please issue a License for this instance.
Configure Instance
- Prepare Application :
Pass a comma separated string of all the softname of all applications that you want to install as follows -
curl 'http://1.1.1.1:2004/install.php?prepareapps=lamp&license=WEBUZO-0000-0000-0000-0000'- Prepare Script :
Pass the SID of the script that you want to install as follows -
curl 'http://1.1.1.1:2004/install.php?prepareinstall=26&license=WEBUZO-0000-0000-0000-0000'Customize your Logo
You can specify a custom Logo for your Instance. Call your URL with the Logo URL as a parameter.
curl 'http://1.1.1.1:2004/install.php?preparelogo=www.example.com/url/to/logo'Restrict only a Particular Script
You can restrict the Enduser to list only one single script. Call your URL with the Script ID as a parameter.
curl 'http://1.1.1.1:2004/install.php?onlyone=26'- On success of any of the above API Calls, you should get 1 as the return value. Above API calls are sample calls, you will need to replace your actual data in them before using.
Summation
The following is a complete list of commands to configure and install Webuzo along with LAMP stack and WordPress
curl 'http://1.1.1.1:2004/install.php?prepareapps=lamp&license=WEBUZO-0000-0000-0000-0000'
curl 'http://1.1.1.1:2004/install.php?prepareinstall=26&license=WEBUZO-0000-0000-0000-0000'
curl 'http://1.1.1.1:2004/install.php?onlyone=26'
curl --data "uname=soft&email=admin@example.com&pass=password&rpass=password&domain=example.com&ns1=ns1.example.com&ns2=ns2.example.com&lic=WEBUZO-0000-0000-0000-0000&admin_email=admin@example.com&submit=1&api=serialize" http://1.1.1.1:2004/install.php- The above commands are filled with garbage values, you will need to fill out your actual values before executing them.
Input Parameters
| Key | Type | Sample Value | Description |
|---|---|---|---|
| prepareapps | GET/POST | lamp | Comma separated values of applications to be installed |
| prepareinstall | GET/POST | 26 | SID of Script to be installed |
| license | GET/POST | WEBUZO-0000-0000-0000-0000 | Webuzo License key |
| sitename | GET/POST | Company | The name of the server or company using Webuzo |
| panel_language | GET/POST | English | The name of the preferred language |
| onlyone | GET/POST | 26 | Restrict panel to this only one script with SID as mentioned |
| preparelogo | GET/POST | www.example.com/url/to/logo | URL for the new logo of the panel |
| uname | POST | soft | Webuzo username |
| POST | admin@example.com | Email address of the user | |
| pass | POST | password | Webuzo user password |
| rpass | POST | password | Webuzo user password (again to be sure !) |
| domain | POST | example.com | FQDN to be set as your Primary domain |
| ns1 | POST | ns1.example.com | FQDN of your first Nameserver |
| ns2 | POST | ns2.example.com | FQDN of your second Nameserver |
| lic | POST | WEBUZO-0000-0000-0000-0000 | Webuzo license Key. If empty, a free version of license is issued automatically. |
| admin_username | POST | admin | Script's Admin username |
| admin_pass | POST | pass | Script's Admin password |
| admin_email | POST | admin@example.com | Script's Admin Email address |
Further Configuration
License Key
If you have already purchased a Webuzo License, it will be showed while configuring your application.
The above API URL creates a temporary license file to store the license key and produce the License key while configuring your instance.
The temporary License file is deleted on completion of the process
Name Servers
If you do not want your users set the nameservers while configuring Webuzo, you need to create a file named hidens in your /usr/local/webuzo/ folder while creating the OS template.
This will disable the nameserver fields while configuring Webuzo.
Alternately, if you do not set your Nameservers, it will be set to:
- ns1.example.com
- ns2.example.com by default.
Unattended Installation Of Webuzo
You can follow the below steps to create installation of Webuzo that does not need any handling on your side.
- Create a new file /usr/local/webuzo/sdk/unattended.php. You can downloaded a template for the same from here :File:Unattended.zip
- Populate the file with details required to configure Webuzo and save the file.
- Execute the following command to configure Webuzo :
/usr/local/emps/bin/php /usr/local/webuzo/sdk/unattended.phpInput Parameters
| Key | Sample Value | Description | Type |
|---|---|---|---|
| ip | 1.1.1.1 | The IP of your instance/VPS | Compulsory |
| user | soft | Username with which Webuzo will be configured. | Compulsory |
| admin@example.com | Admin mail address on which updates and machine statistics will be mailed. | Compulsory | |
| pass | demo | Webuzo user password with which panel can be accessed. | Compulsory |
| host | mydomain.com | FQDN to be set as your Primary domain. | Compulsory |
| ns1 | ns1.mydomain.com | FQDN of your first Nameserver. | Optional |
| ns2 | ns2.mydomain.com | FQDN of your second Nameserver. | Optional |
| license | WEBUZO-0000-0000-0000-0000 | Webuzo license Key. If empty, a free version of license is issued automatically. | Optional |
| script_id | 26 | ID of the script that you need to install | Compulsory |
| admin_username | admin | Username of Administrator | Compulsory |
| admin_pass | pass | Password of Administrator | Compulsory |
| admin_email | admin@example.com | Email address of Administrator | Compulsory |
The following example will install and configure Webuzo along with WordPress
$config['ip'] = '11.11.11.11';
$config['user'] = 'soft';
$config['email]'] = 'admin@example.com';
$config['pass'] = 'demo';
$config['host'] = '11.11.11.11'; $config['ns1'] = '';
$config['ns2'] = '';
$config['license'] = 'WEBUZO-0000-0000-0000-0000';
$script_id = 26;
$data['admin_username'] = 'admin';
$data['admin_pass'] = 'pass';
$data['admin_email'] = 'admin@example.com';
Finish installation
You can now hand over the URL of the Instance to the user.
Note : If you have already provided the License key, it will automatically be visible while configuring your Webuzo Server.
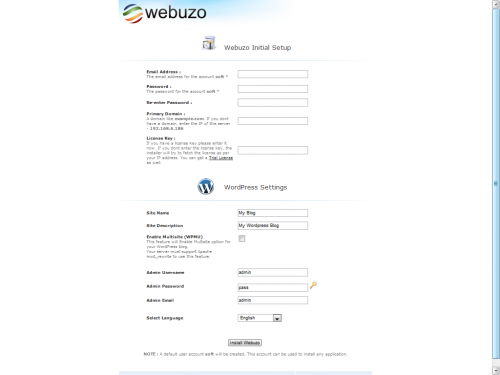
Initial Setup
Visit your Webuzo Instance and the user can fill in the desired details :
https://'''YOUR-IP''':2005/install.php
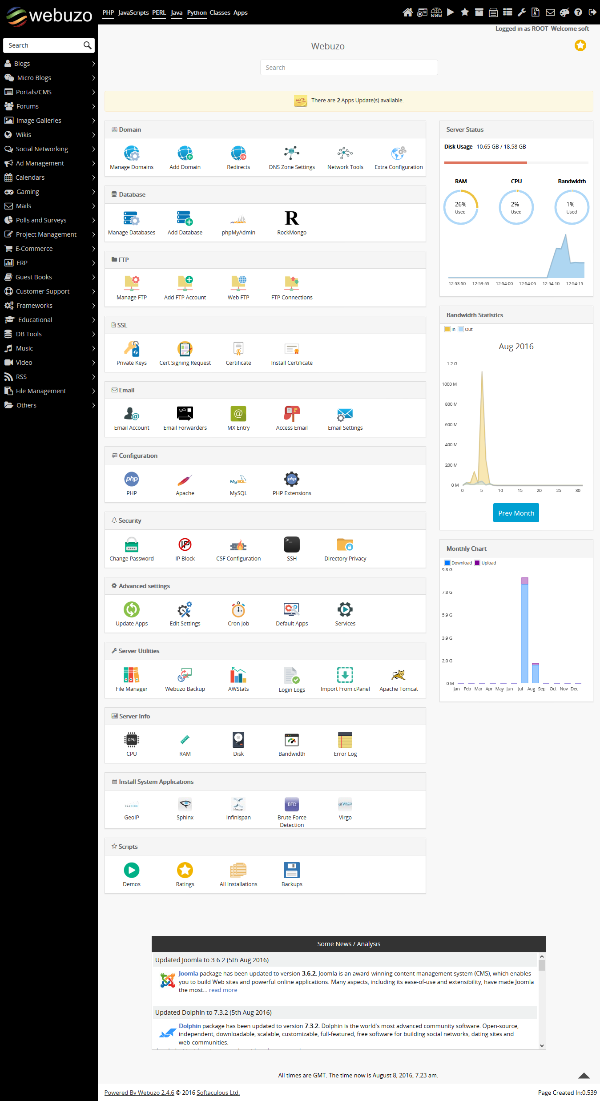
Webuzo Panel
Users can visit the Webuzo Panel at the following URL :
https://YOUR-IP:2003/
Webuzo Amazon Integration
We have made our own integration into the AMAZON EC2 Cloud Platform. A video is also available :
- You can use the above guide to make something similar for your cloud platform.
Support
If you need any further information, please contact us at support@webuzo.com
